
The Vanity That Made It Into Our Wedding Vows - One Room Challenge Week 4
Okay guys, as I promised last week - this week is all about the dresser we turned into a vanity for the guest bathroom! We didn’t actually accomplish a ton during week 4 of the One Room Challenge, but I’m gonna attempt to do a quick break down of how the dresser turned vanity came to be!
But first of all - let me jump into story time re: the title of this post. In our last guest bathroom, we also had a dresser that we turned into a vanity, and my husband kind of hated me for it. He was confused what I was even talking about when I first told him the idea, and then he was all unsure about how he was going to do it… and then threw out some expletives during it… and then loved it afterwards and always pointed it out to people when we showed them around the house. (Insert eye roll emoji here) Anyway, one of our wedding vows was along the lines of “thanks for going along with all of my crazy house ideas, like turning dressers into vanities”… and here we are again for round 2! (Side note - I was just telling Elizabeth how Dairy Queen was also in our wedding vows… these clearly were not your traditional wedding vows - ha!)
Okay, back to present day. I love the idea of a dresser turned vanity because it adds a lot of character to a space, and is also super cost effective. Have you ever shopped for vanities? Those things do NOT come cheap, but you know what does? A $55 midcentury dresser from Craigslist. Pop a vessel sink and a faucet on that baby and boom - affordable vanity!
Here’s a brief step by step of how to turn a dresser into a vanity:
Step one
Cut a hole in the back of the dresser to accommodate the plumbing. In our case, our sink was going to be off to the left side, so that’s where the hole went. You can slide the dresser into the final resting place after you’ve done this.
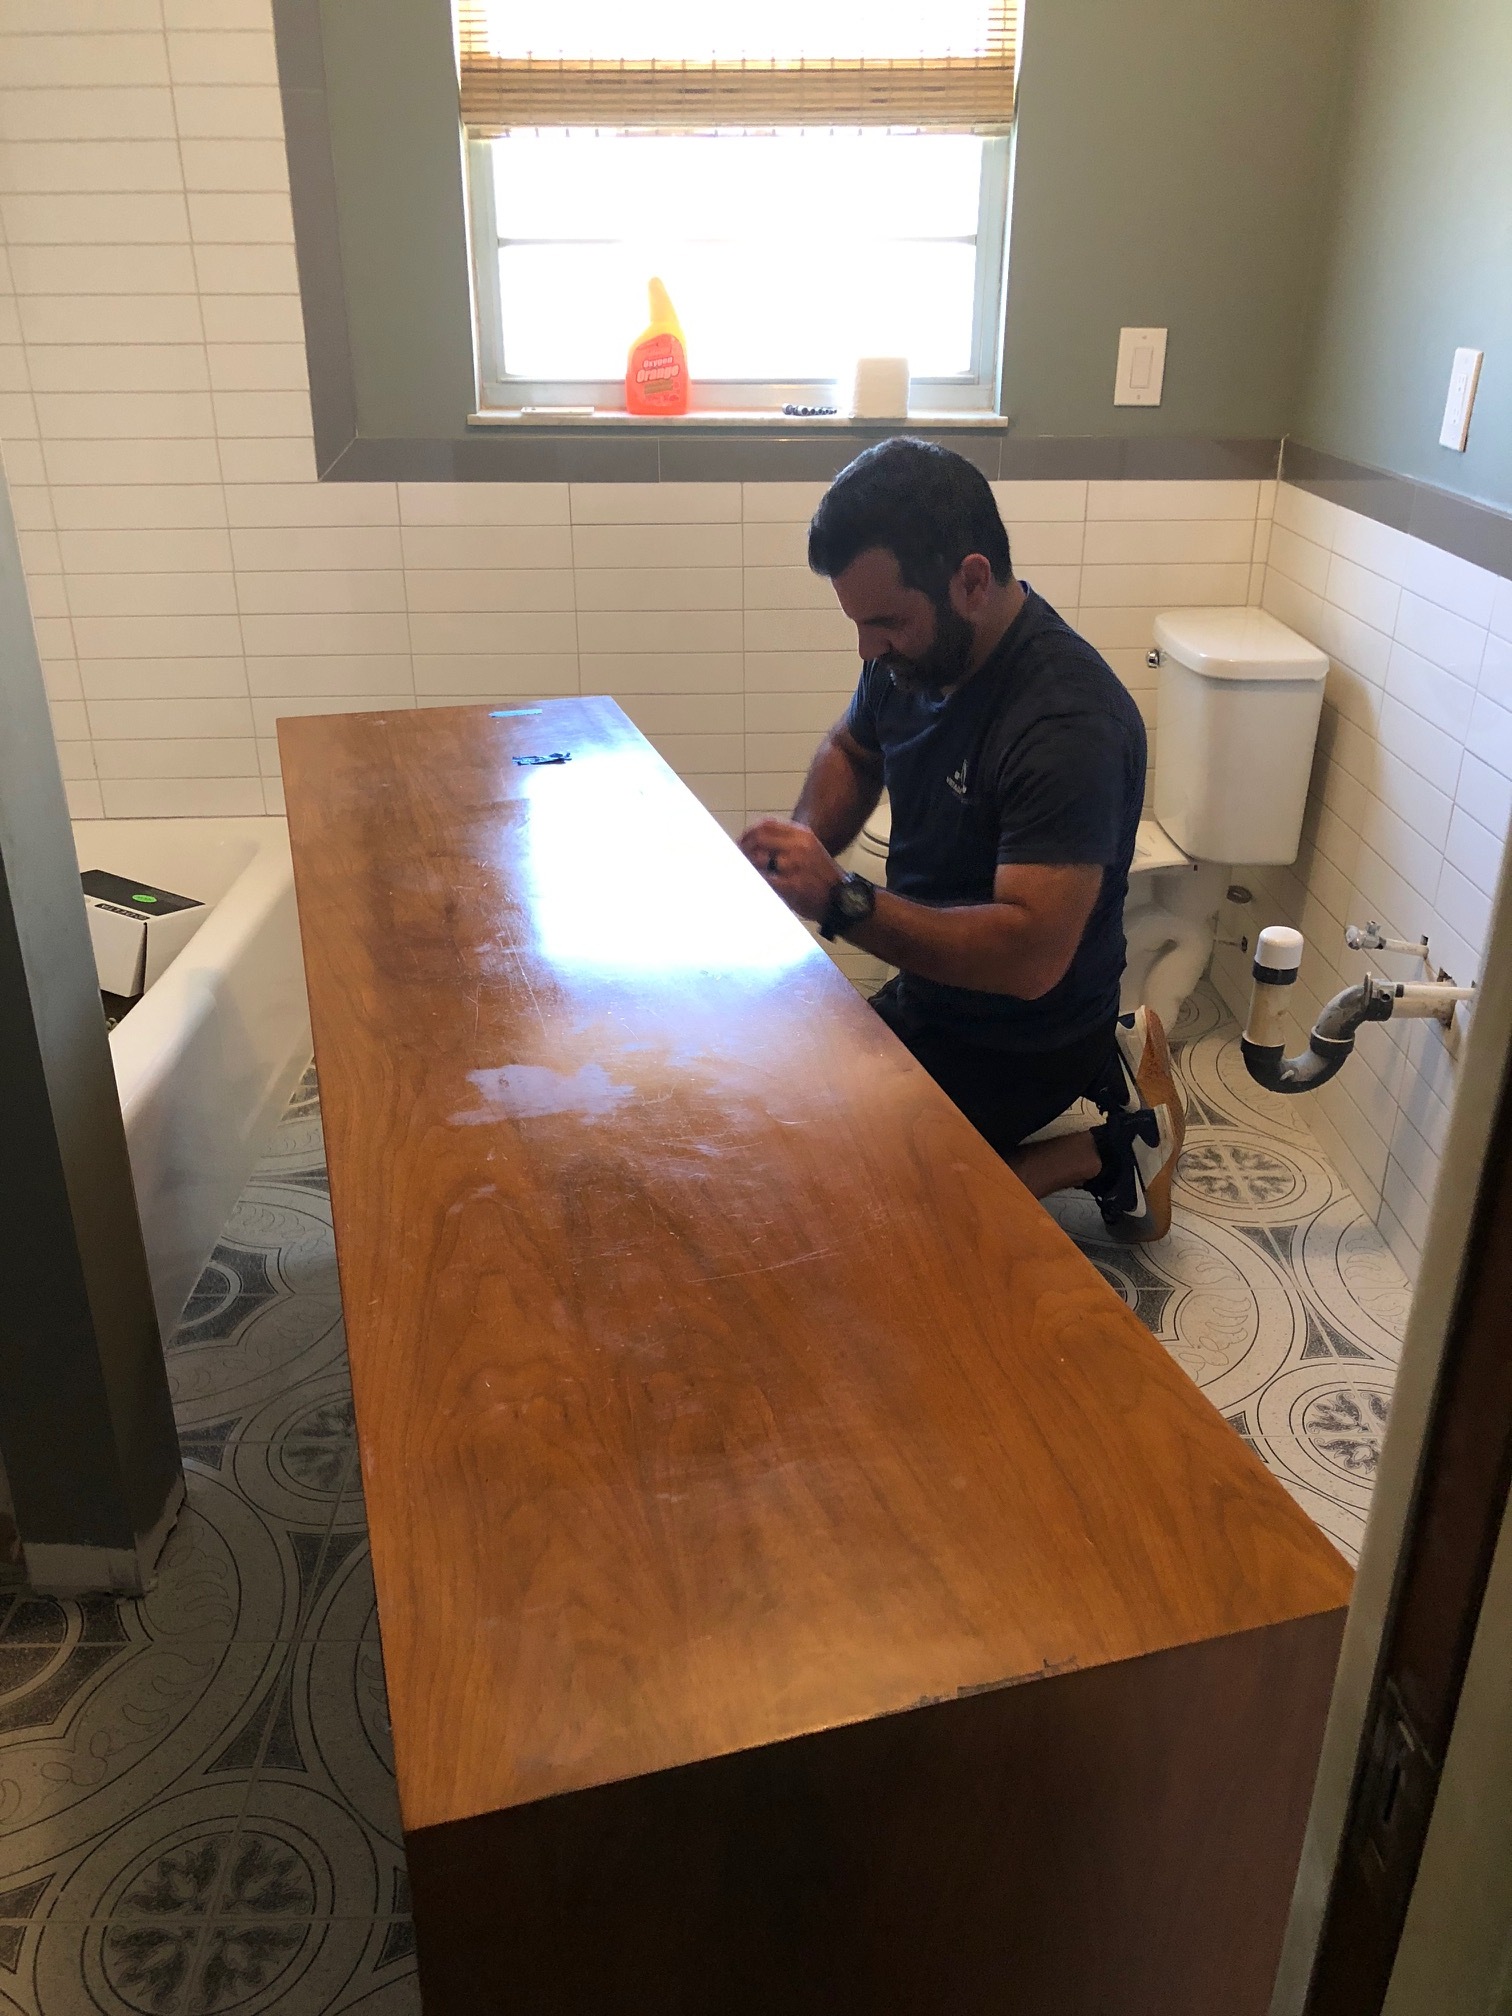


step two
Cut two wholes in the top of the dresser - one for the faucet and one for the sink drain.


step three
Modify the drawers that are in front of the plumbing. If you want to maintain some storage space in the drawers, you can cut out a large notch in the drawers that will fit around in the plumbing. Or, do what we did here and just cut the back of the drawer off. We have plenty more storage space in this dresser (and the bathroom in general) so I didn’t feel the need to keep any parts of these drawers intact.


step four
Install the faucet, vessel sink, and drain, and hook up all of the plumbing. I’m not a plumber, so that’s about as much detail as I’ll provide on that step! ;)
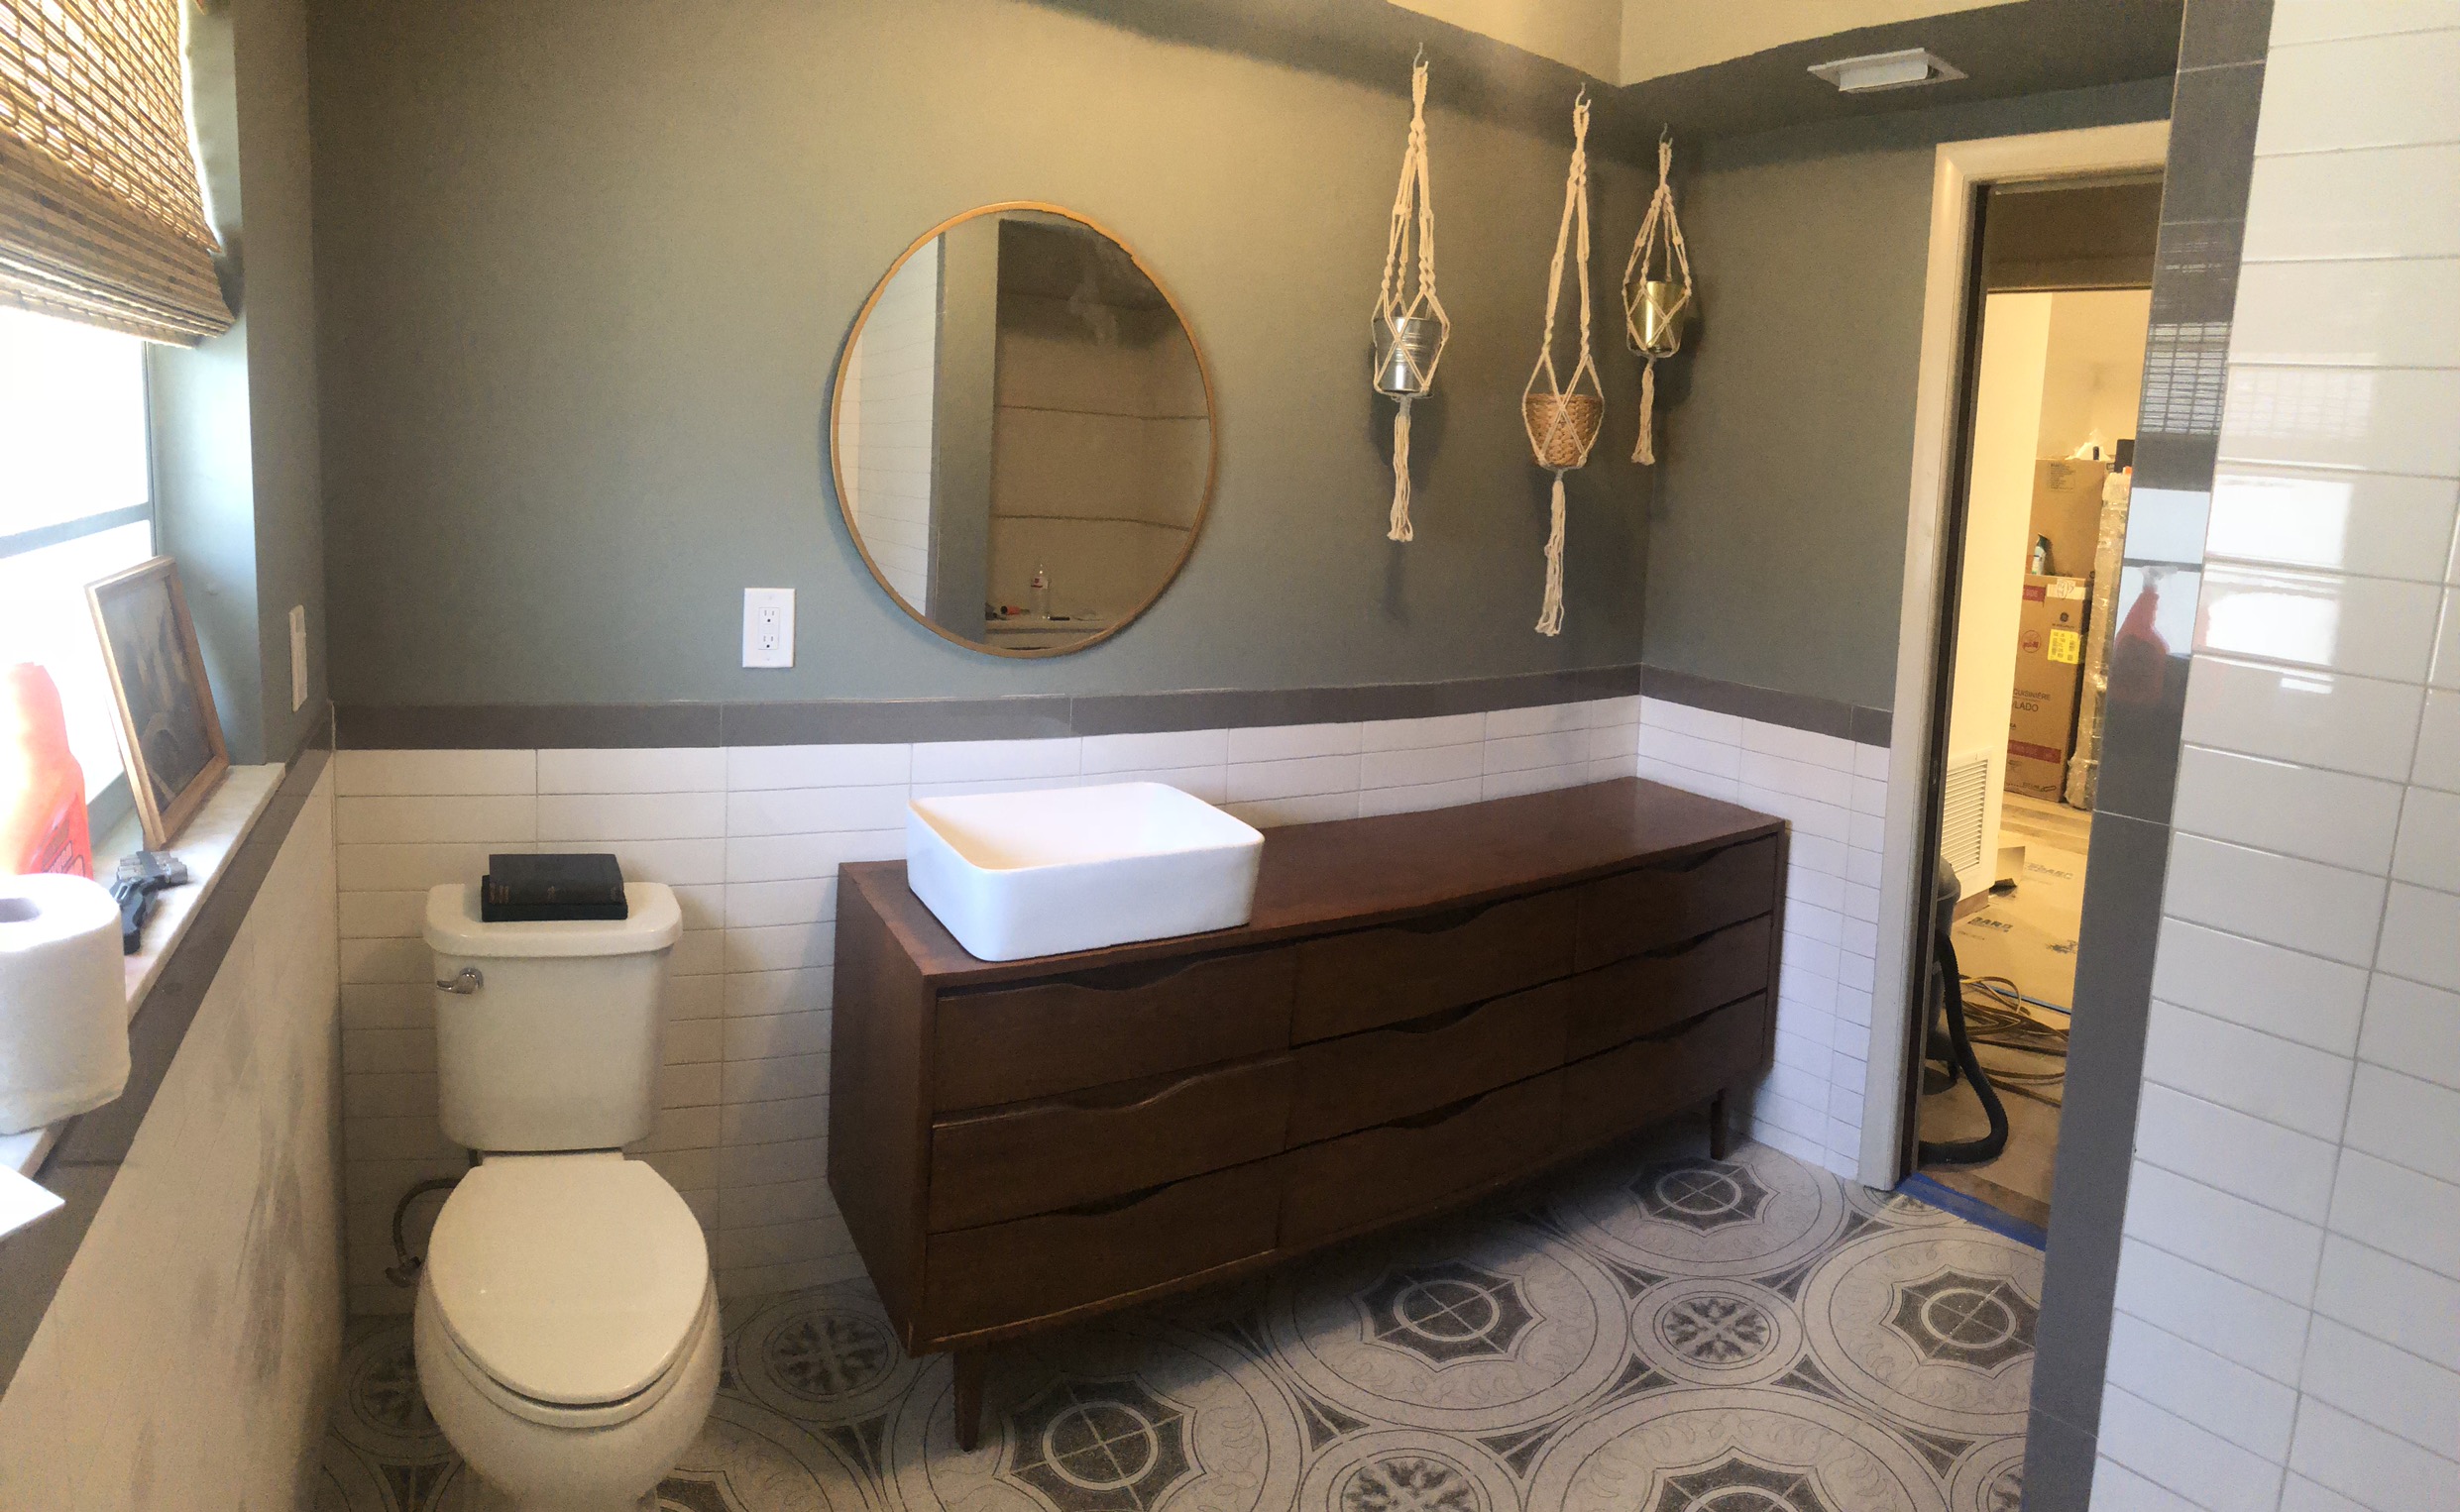
So there you have it! The super basic, in-a-nutshell guide to turning a dresser into a vanity. I’m sure there are much more thorough and technical tutorials out there, but hopefully you get the gist from this! I’m so happy with how our vanity turned out, and the whole thing was less than $150. You can’t even get a crappy IKEA vanity for that price! (Edit: I’m not hating on IKEA - I loveeee IKEA)
Over the next two weeks we’ll be putting the finishing touches on this room - painting and organizing the linen closet that’s in here, and doing the fun part - accessorizing! Make sure you go check out everyone else’s One Room Challenge progress this week too!