
DIY Rustic Coffee Table Makeover
So, I've finally stopped staring at our amazing new coffee table long enough to come write about how we made it! Needless to say, I absolutely LOVE it, and am so thrilled with how it turned out. It was pretty easy too.
Our coffee table started out here:

So you may not think the "before" is that bad, but both Ryan and I hated this table. It's just not our style at all. Glass top - shudder.
I had a rustic, farmhouse-style table in mind for the after. The plan was to paint the base of the existing table, and then create a weathered wood top to screw into the existing top. (Details on how we made our new wood look old and weathered here).
Step one was painting the table base. We went with Americana Decor chalk pain in Lace for the color. Chalk paint has a lot of benefits, including the fact that it easily covers and sticks to non-wood and finished surfaces with no sanding or priming. It was pretty streaky after just one coat, as you can see below, but looked much better after the second coat was applied.

After the first coat, pretending to be Nicole Curtis in my glasses, ha!
After staring at the base in this color for a day, I decided it still needed a little somethin' somethin'. Enter the gray wash. I mixed two parts gray paint (the same one I used for the planks) and one part water, and brushed that onto the base of the table. Immediately after brushing it on, I used a T-shirt to rub it into the wood. This gave it a cool, weathered finish without showing brush strokes.
Once the base and wood planks were both dry, we arranged the top onto the base where we wanted it.
All that was left was to attach the two! Minor details, huh? Our original plan was to screw the top onto the bottom, but then I realized I didn't want screws showing - I wanted nail heads instead. After marking off where each nail would go, we drilled pilot holes, making sure to go all the way through both the top and the base.

The next issue was the nails that we had - they were bright silver, which is soooo not rustic. Ha. Our solution? Spray paint them black! We stuck the nails through a piece of cardboard to make spraying easy peasy.

We realized that once we started hammering these into the table, the hammer was going to take some of the spray paint off the nails. That actually ended up being okay, because I really liked the look of the partially-painted nail heads. If you want perfectly black nail heads, I don't know what to tell you. Actually, I guess I'd tell you to just go buy black nails in the first place.
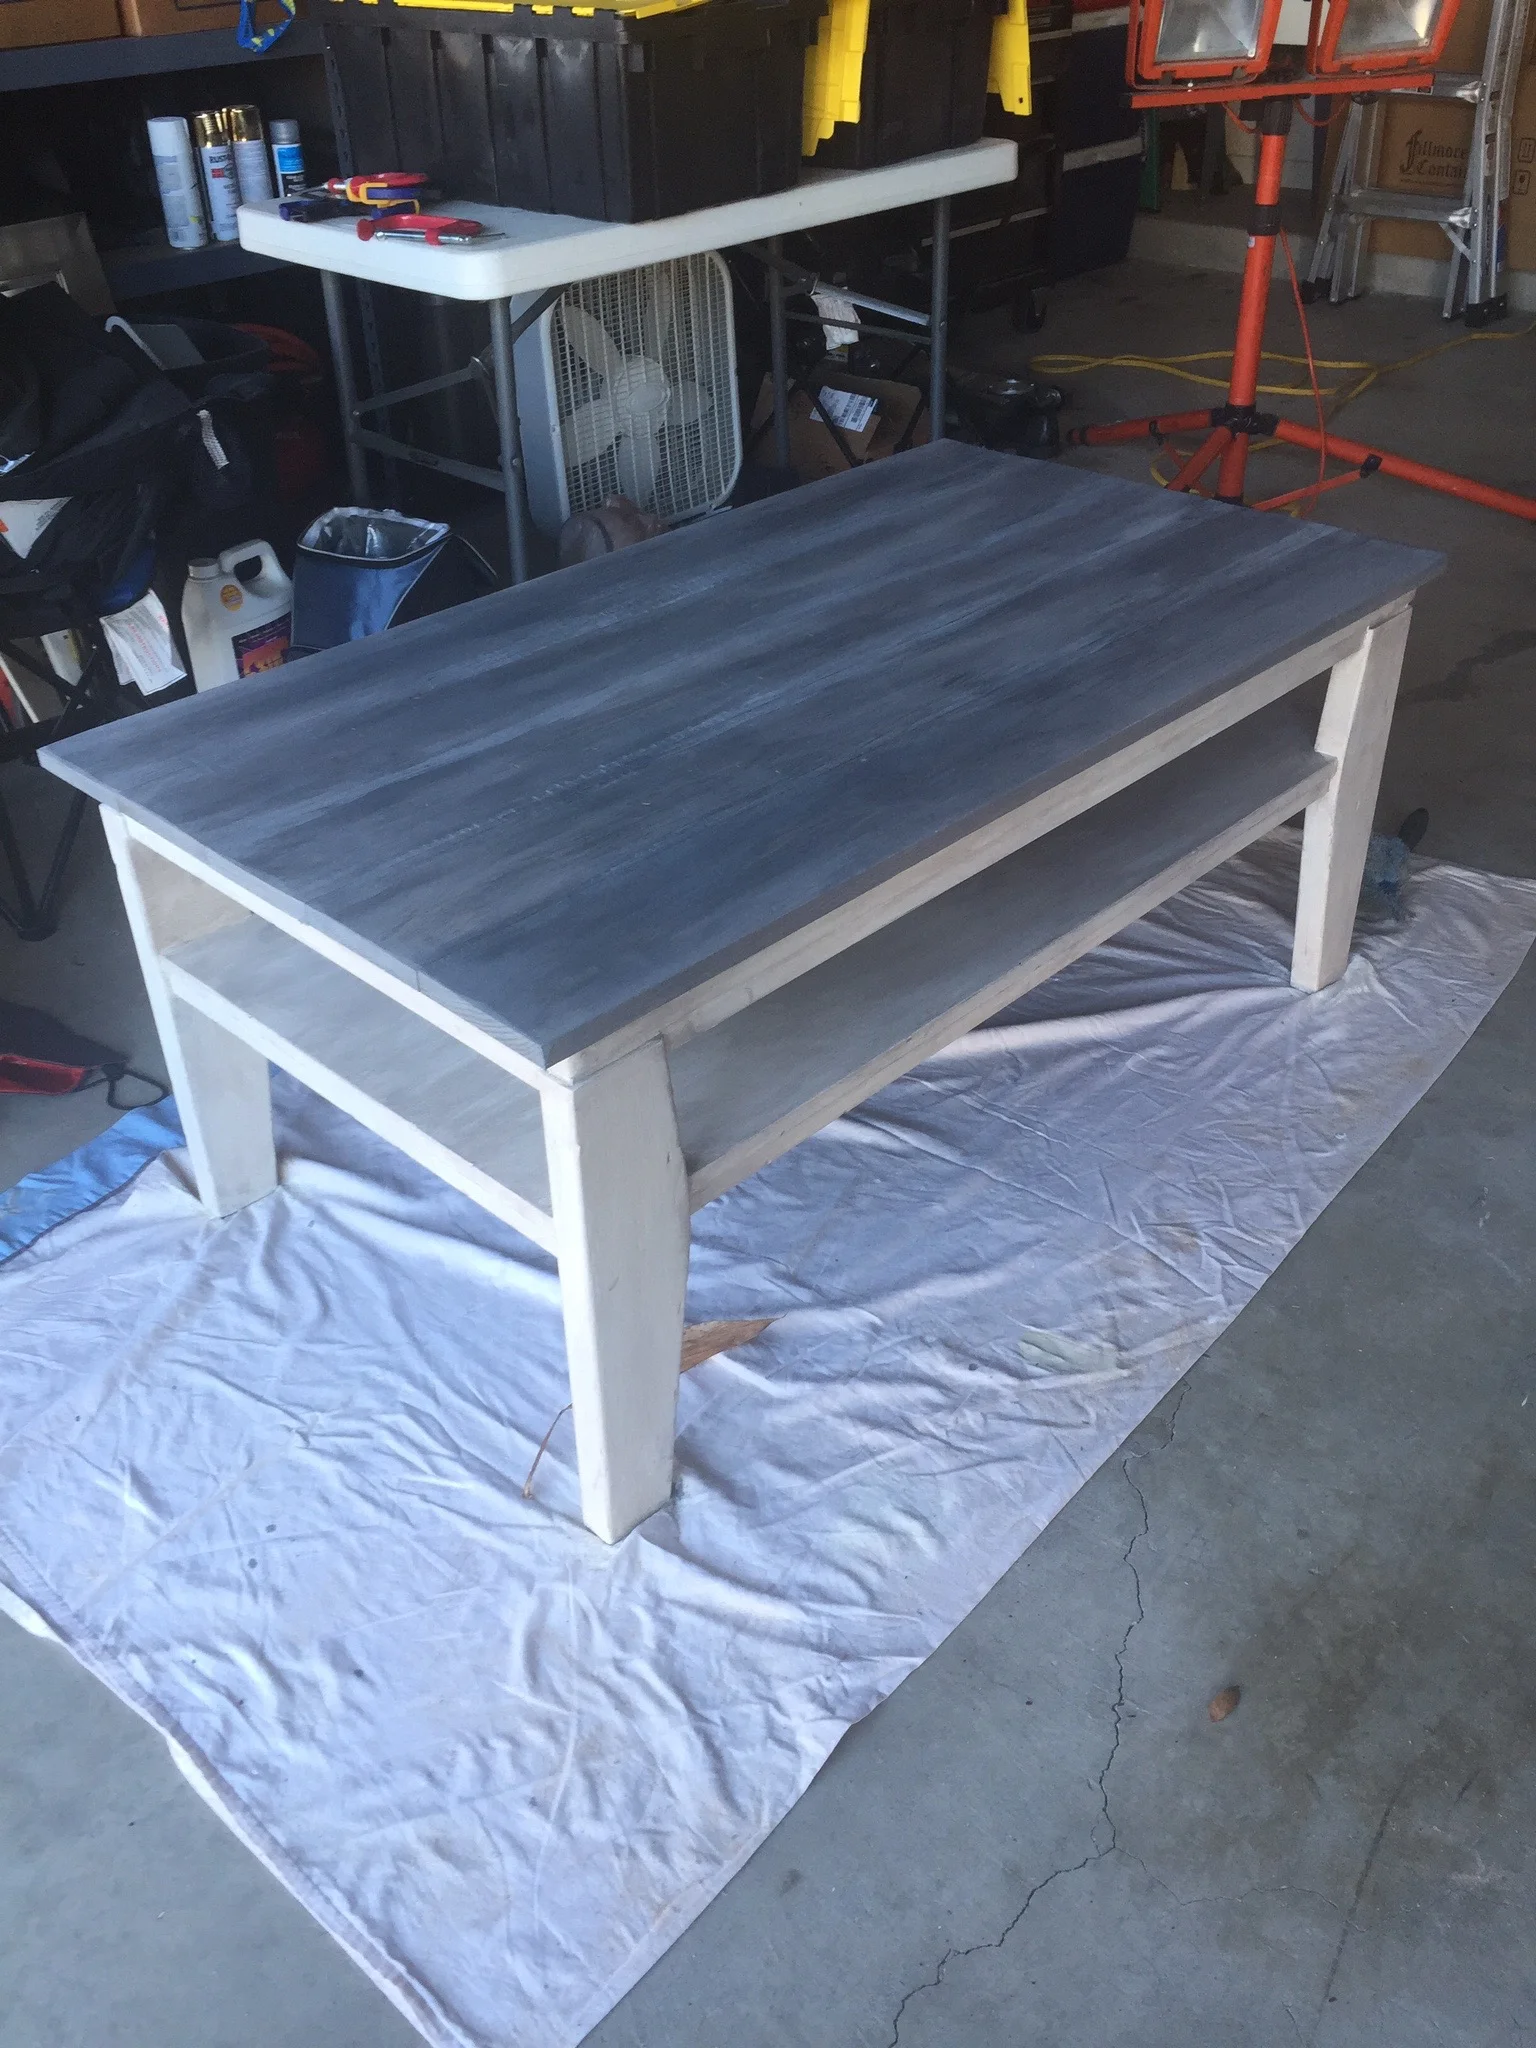
And that's pretty much it! Here's the table in all her glory:

I just love it! And now I'm itching to get my hands on all of our other furniture!
What do you think? Do you like our new table?
